Building a real-time Todo app with Drayman, MongoDB and Tailwind CSS

In this guide we will build a real-time Todo app with Drayman, MongoDB and Tailwind CSS.
If you are using regular tools, you would need to create a server with endpoints, a client app using some modern framework or just vanilla JavaScript. With Drayman, however, it will be just a single script with 100 lines of code.
If you are new to Drayman, you can go to our official docs to check out how it works or to read other guides.
Prerequisites#
This guide assumes that you:
- have installed Drayman project locally or you are using it through new.drayman.io;
- have MongoDB installed with Change Stream functionality enabled. For this guide you can create a free cloud MongoDB database here. This way you get Change Stream functionality enabled by default.
When Drayman project is ready and you have MongoDB up and running, we can start developing our Todo app by adding Tailwind CSS.
Setting up Tailwind CSS#
First, you'll need to install autoprefixer and tailwindcss:
npm install -D tailwindcss@latest autoprefixer@latestNext, generate tailwind.config.js and postcss.config.js files with this command:
npx tailwindcss init -pNow modify tailwind.config.js file to exclude non-used CSS classes on compile:
module.exports = { purge: [ "./src/**/*.tsx", ], darkMode: false, theme: { extend: {}, }, variants: { extend: {}, }, plugins: [],};Create your main CSS file at src/styles.css and append this code:
@tailwind base;@tailwind components;@tailwind utilities;The final step is to modify public/index.html file to include the generated CSS file. Drayman will generate it to the public/styles.css file:
<!DOCTYPE html><html>  <head>    <meta charset="utf-8" />    <meta http-equiv="X-UA-Compatible" content="IE=edge" />    <title>Drayman Framework</title>    <meta name="viewport" content="width=device-width, initial-scale=1" />    <script src="/drayman-framework-client.js"></script>    <link rel="stylesheet" href="styles.css" />  </head>
  <body>    <drayman-element component="home"></drayman-element>
<script> initializeDraymanFramework(); </script> </body></html>Creating a Todo app#
We will start by adding basic UI using Tailwind CSS classes and then improve our solution to include real-time functionality and MongoDB support.
Adding basic UI#
Paste this code inside src/components.home.tsx:
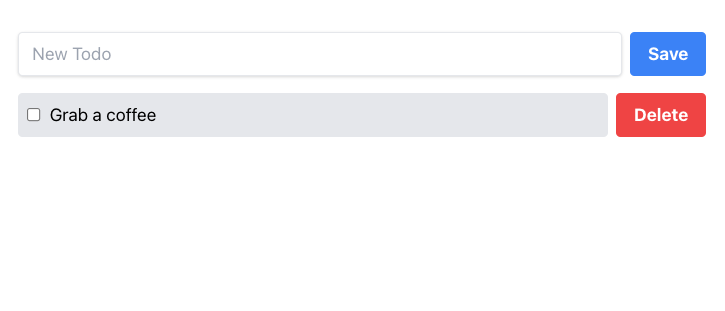
export const component: DraymanComponent = async () => { return async () => { return ( <div class="flex justify-center items-center"> <div class="flex flex-col pt-8 lg:w-2/5 sm:w-3/5 w-11/12 gap-4"> <div class="flex gap-2"> <input placeholder="New Todo" class="shadow appearance-none border rounded w-full py-2 px-3 text-gray-700 leading-tight focus:outline-none focus:shadow-outline" /> <button class={`bg-blue-500 text-white font-bold py-2 px-4 rounded`} > Save </button> </div> <div class="flex items-center gap-2"> <div class={`flex flex-grow items-center gap-2 bg-gray-200 p-2 rounded cursor-pointer`} > <input class="flex-none" type="checkbox" /> <div class="flex-grow">Grab a coffee</div> </div> <button class="flex-none bg-red-500 hover:bg-red-700 text-white font-bold py-2 px-4 rounded"> Delete </button> </div> </div> </div> ); };};If Tailwind CSS was successfully initialized, you should see this result in your browser:
Adding MongoDB support#
For this guide we will use Change Stream functionality of MongoDB to make our Todo list work in real-time. This way if something gets changed in the database, our application will reflect these changes. Let's modify our src/components/home.tsx component and see in detail what is happening inside our script:
import { MongoClient, ObjectId } from "mongodb";
interface Todo {  _id: ObjectId;  text: string;  done: boolean;}
export const component: DraymanComponent = async ({  forceUpdate,  ComponentInstance,}) => {  const uri = "YOUR_MONGODB_CONNECTION_STRING";  const client = new MongoClient(uri);  await client.connect();  const db = client.db("todo");  const todoListCollection = db.collection<Todo>("list");
  let todos = await todoListCollection.find().toArray();
  todoListCollection.watch().on("change", async (x) => {    if (x.operationType === "insert") {      todos.push(x.fullDocument as Todo);    } else if (x.operationType === "update") {      todos = todos.map((todo) => {        if (todo._id.equals(x.documentKey._id)) {          return { ...todo, ...x.updateDescription.updatedFields };        }        return todo;      });    } else if (x.operationType === "delete") {      todos = todos.filter((todo) => !todo._id.equals(x.documentKey._id));    }    await forceUpdate();  });
  ComponentInstance.onDestroy = async () => {    await client.close();  };
return async () => { return ( <div class="flex justify-center items-center"> <div class="flex flex-col pt-8 lg:w-2/5 sm:w-3/5 w-11/12 gap-4"> <div class="flex gap-2"> <input placeholder="New Todo" class="shadow appearance-none border rounded w-full py-2 px-3 text-gray-700 leading-tight focus:outline-none focus:shadow-outline" /> <button class="bg-blue-500 text-white font-bold py-2 px-4 rounded"> Save </button> </div> {todos.map((x) => ( <div class="flex items-center gap-2"> <div class={`flex flex-grow items-center gap-2 ${ x.done ? `bg-green-200 line-through` : `bg-gray-200` } p-2 rounded cursor-pointer`} > <input class="flex-none" checked={x.done} type="checkbox" /> <div class="flex-grow">{x.text}</div> </div> <button class="flex-none bg-red-500 hover:bg-red-700 text-white font-bold py-2 px-4 rounded"> Delete </button> </div> ))} </div> </div> ); };};First, we have added a connection to our database (don't forget to change YOUR_MONGODB_CONNECTION_STRING to your actual connection string). Then we made the initial fetch of our Todo list by converting it to an array - let todos = await todoListCollection.find().toArray();.
Then we added real-time functionality by watching for changes to database todoListCollection.watch():
- on
inserta Todo will be pushed totodosarray; - on
updatea specific Todo fromtodosarray will be updated; - on
deletea specific Todo fromtodosarray will be deleted.
The component will reflect all these changes because we also call the forceUpdate function - if any change gets caught, the component will re-render itself.
Finally, we are using the onDestroy lifecycle method to close the connection to the database when a component instance gets destroyed.
We also have made changes to our UI by mapping through todos array and rendering each Todo and changing CSS classes dynamically when a Todo is done.
As a result, any change made inside the database (I am using TablePlus for this), gets reflected inside our component:
Our final step will be to make the input field and buttons work as expected.
Adding functionality to UI elements#
We will start by modifying the <input> element:
// ...let newTodo: string;// ...
return async () => { return ( // ... <input placeholder="New Todo" class="shadow appearance-none border rounded w-full py-2 px-3 text-gray-700 leading-tight focus:outline-none focus:shadow-outline" value={newTodo} oninput={async ({ value }) => { newTodo = value; await forceUpdate(); }} /> // ... );};The variable newTodo was introduced. When the user types in something, the oninput event gets triggered that saves the input value to the newTodo variable thus providing a single source of truth - the input's value will always be inside newTodo.
Let's now modify the <button>Save</button> element:
<button class={`bg-blue-500 text-white font-bold py-2 px-4 rounded ${ newTodo ? `hover:bg-blue-700` : `opacity-50 cursor-not-allowed` }`} disabled={!newTodo} onclick={async () => { await todoListCollection.insertOne({ text: newTodo, done: false }); newTodo = null; }}> Save</button>We have modified class and disabled attributes to appear disabled when there is no input by the user (newTodo is empty). When the user clicks a button, onclick gets triggered and a new Todo gets inserted into the database. We also don't need to call forceUpdate here because it already was managed before when watching for database changes. Now we can input something, click the button and the result will appear in the browser:
Our final step will be to modify todos list mapping:
todos.map((x) => ( <div class="flex items-center gap-2"> <div onclick={async () => { await todoListCollection.updateOne( { _id: x._id }, { $set: { done: !x.done } } ); }} class={`flex flex-grow items-center gap-2 ${ x.done ? `bg-green-200 line-through` : `bg-gray-200` } p-2 rounded cursor-pointer`} > <input class="flex-none" checked={x.done} type="checkbox" /> <div class="flex-grow">{x.text}</div> </div> <button class="flex-none bg-red-500 hover:bg-red-700 text-white font-bold py-2 px-4 rounded" onclick={async () => { await todoListCollection.deleteOne({ _id: x._id }); }} > Delete </button> </div>));Here we have added the onclick event handler for <div> to mark a Todo done or undone and the onclick event handler for <button>Delete</button> to delete a Todo from the database when it is clicked.
Our component is now complete and you can open a page with this component in multiple tabs to check real-time functionality:
Final component script#
import { MongoClient, ObjectId } from "mongodb";
interface Todo {  _id: ObjectId;  text: string;  done: boolean;}
export const component: DraymanComponent = async ({  forceUpdate,  ComponentInstance,}) => {  const uri = "YOUR_MONGODB_CONNECTION_STRING";  const client = new MongoClient(uri);  await client.connect();  const db = client.db("todo");  const todoListCollection = db.collection<Todo>("list");
  let todos = await todoListCollection.find().toArray();  let newTodo: string;
  todoListCollection.watch().on("change", async (x) => {    if (x.operationType === "insert") {      todos.push(x.fullDocument as Todo);    } else if (x.operationType === "update") {      todos = todos.map((todo) => {        if (todo._id.equals(x.documentKey._id)) {          return { ...todo, ...x.updateDescription.updatedFields };        }        return todo;      });    } else if (x.operationType === "delete") {      todos = todos.filter((todo) => !todo._id.equals(x.documentKey._id));    }    await forceUpdate();  });
  ComponentInstance.onDestroy = async () => {    await client.close();  };
return async () => { return ( <div class="flex justify-center items-center"> <div class="flex flex-col pt-8 lg:w-2/5 sm:w-3/5 w-11/12 gap-4"> <div class="flex gap-2"> <input placeholder="New Todo" class="shadow appearance-none border rounded w-full py-2 px-3 text-gray-700 leading-tight focus:outline-none focus:shadow-outline" value={newTodo} oninput={async ({ value }) => { newTodo = value; await forceUpdate(); }} /> <button class={`bg-blue-500 text-white font-bold py-2 px-4 rounded ${ newTodo ? `hover:bg-blue-700` : `opacity-50 cursor-not-allowed` }`} disabled={!newTodo} onclick={async () => { await todoListCollection.insertOne({ text: newTodo, done: false, }); newTodo = null; }} > Save </button> </div> {todos.map((x) => ( <div class="flex items-center gap-2"> <div onclick={async () => { await todoListCollection.updateOne( { _id: x._id }, { $set: { done: !x.done } } ); }} class={`flex flex-grow items-center gap-2 ${ x.done ? `bg-green-200 line-through` : `bg-gray-200` } p-2 rounded cursor-pointer`} > <input class="flex-none" checked={x.done} type="checkbox" /> <div class="flex-grow">{x.text}</div> </div> <button class="flex-none bg-red-500 hover:bg-red-700 text-white font-bold py-2 px-4 rounded" onclick={async () => { await todoListCollection.deleteOne({ _id: x._id }); }} > Delete </button> </div> ))} </div> </div> ); };};Conclusion#
We have created a real-time Todo app with Drayman, MongoDB and Tailwind CSS in just 100 lines of code, inside a single script.
If this felt interesting to you, visit the official docs to deep-dive into Drayman framework!
